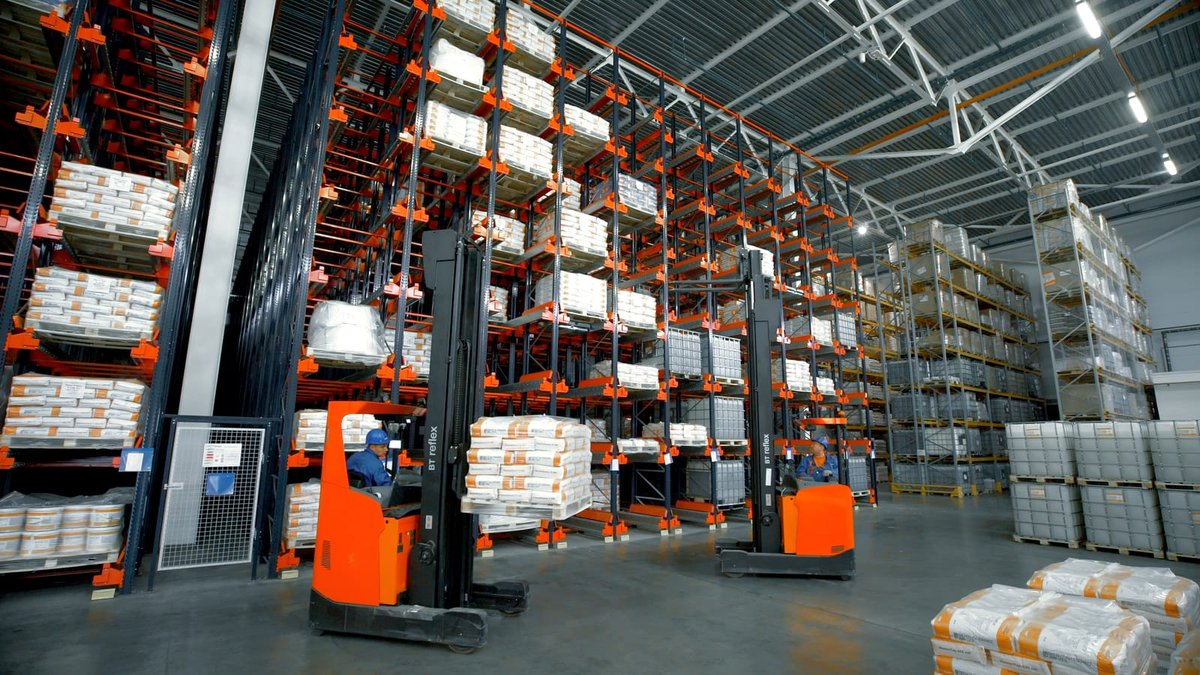
The hum of a well-oiled donut machine is music to any baker's ears. But when that hum falters, when the oil darkens prematurely, or the donuts emerge misshapen, you know it's time for some focused Troubleshooting & Maintenance of Donut Farms. Keeping your donut makers running isn't just about daily cleaning; it's a strategic blend of prevention, precision, and timely intervention that ensures consistent product quality and a healthy bottom line.
Ignoring the subtle signs of wear and tear can be surprisingly costly. Improper care routines, for instance, are the culprits behind 43% of equipment breakdowns in commercial bakeries, leading to unexpected equipment failures that can drain an average of $5,000 daily from a commercial kitchen's budget. The good news? Proactive care extends equipment lifespan by up to 40%, and simple daily routines can prevent a staggering 80% of common operational issues. This guide will walk you through building a resilient maintenance strategy, making sure your donut production line stays sweet and profitable.
At a Glance: Key Takeaways for Your Donut Farm
- Proactive, not reactive: Daily checks and weekly routines prevent most issues and extend equipment life by up to 40%.
- Safety First: Always unplug and cool equipment before cleaning; use thermal gloves and have a Class K extinguisher ready.
- Precision Cleaning: Use food-grade, pH-neutral detergents and non-abrasive cloths. Never use metal tools on fry baskets.
- Oil is Gold: Filter fryer liquid daily and monitor temperature closely (max 375°F) to prevent degradation and fire risks.
- Lubricate & Calibrate: Monthly gear lubrication and size setting calibration drastically reduce wear and improve consistency.
- Don't Ignore the Small Stuff: Tighten regulation nuts, inspect seals, and address minor issues within 48 hours to avoid bigger, costlier repairs.
- Consider Upgrades: Newer models offer self-cleaning features and energy efficiency, addressing 78% of traditional maintenance pain points.
Why Your Donut Farm Needs Dedicated TLC
Think of your donut maker as the heart of your operation. Just like any crucial organ, it needs consistent, careful attention to function optimally. Neglecting this vital equipment isn't just about a potential breakdown; it's about product inconsistency, reduced efficiency, and significant financial losses. The numbers speak for themselves: proactive care can extend your equipment's lifespan by up to 40%, while daily routines prevent a remarkable 80% of common operational issues. Proper lubrication, a simple step, directly reduces wear on moving parts, contributing to quieter operation and longevity.
Ultimately, your maintenance strategy aims to protect your product quality above all else. Hygiene-first cleaning protocols ensure every donut meets your high standards, batch after batch.
Core Goals of Donut Maker Maintenance
To keep your donut makers running flawlessly, focus on these critical areas:
- Prevent Oil Degradation: Filtering your fryer liquid daily is non-negotiable for consistent frying results. Degraded oil affects taste, texture, and even fryer performance.
- Protect Electrical Parts: A weekly inspection of cords and connections isn't just about preventing malfunctions; it's about mitigating serious fire risks.
- Extend Component Life: Monthly lubrication of gears leads to quieter operation and significantly longer component lifespan, delaying costly replacements.
Combining manufacturer guidelines with industry best practices helps tackle 83% of common issues before they escalate. Remember to pay special attention to heat management during oil changes and proper storage of removable parts to keep everything in top shape.
Know Your Machine: Specifications and Safety First
Before any wrench turns or cloth wipes, understand the fundamental specifications and critical safety protocols of your donut machine. Most commercial models require standard 120V outlets, with heating power typically ranging between 1500-1800W. Crucially, the maximum oil temperature requirement is 375°F; exceeding this benchmark risks smoke, flare-ups, and even serious fires. Ignoring these core specifications leads to 72% of preventable component failures, a statistic no business wants to be part of.
Handling Hot Surfaces: Non-Negotiable Safety
Working with hot oil and heated surfaces demands absolute vigilance. These steps aren't optional; they prevent 89% of kitchen burns linked to fried desserts:
- Always unplug the unit before attempting to wipe surfaces or change filters. This eliminates the risk of accidental activation or electrical shock.
- Use thermal gloves when adjusting temperature settings or handling any part that might still be warm.
- Keep a Class K fire extinguisher nearby. This specialized extinguisher is designed for kitchen fires involving cooking oils and fats.
- Monitor oil temperature with a calibrated thermometer. Fluctuations above 375°F create fire hazards that can escalate rapidly.
- Allow oil to cool below 150°F before draining after use. Hot oil can cause severe burns and damage plumbing if not properly handled.
Before You Dive In: Preparing for Maintenance
Proper preparation is the bedrock of safe and effective maintenance. Rushing into cleaning or repairs without adequate cooling or the right tools can lead to injuries or further equipment damage.
The Pre-Cleaning Checklist: Cool Down and Clear Out
- Turn off power and unplug the unit. This is your first and most important safety step.
- Wait 45-60 minutes for surfaces to cool below 100°F. Skipping this crucial cooling period causes 68% of heat-related workplace injuries. Patience here is a virtue.
- Remove loose crumbs and debris with a dry, soft cloth. This initial sweep makes subsequent cleaning much easier.
The Right Tools for the Job: Cleaners and Cloths
When it's time to clean, choose your agents wisely. Opt for non-abrasive, food-grade cleaning solutions. Warm water with a pH-neutral detergent is ideal for tackling grease without damaging surfaces. Wipe gently with microfiber soft cloths; avoid scrub pads or steel wool, which can scratch and compromise protective coatings on your equipment. Rinse all surfaces thoroughly to prevent soap buildup, which can affect food quality and equipment performance.
Your Daily, Weekly, Monthly Donut Machine Check-Up
A consistent maintenance schedule is your best defense against unexpected breakdowns. Teams following structured routines experience 30% fewer emergency repairs, saving both time and money. Here’s a breakdown of what to do and when:
- Verify oil heat every 90 minutes using a calibrated thermometer. Fluctuations beyond ±5°F cause uneven browning and inconsistent donut quality.
- Tighten temperature regulation nuts weekly to prevent sensor drift, ensuring accurate temperature readings and control.
- Calibrate size settings monthly using the manufacturer’s gauge tool to adjust extruder plates. This guarantees uniform donut sizes and shapes.
- Lubricate gears every 500 cycles (or monthly, depending on volume) to reduce motor strain and extend the life of moving parts.
- Inspect heating elements weekly for any signs of wear or buildup that could lead to cold spots and uneven cooking.
- Test safety shutoffs monthly to ensure they activate correctly, preventing potential overflow incidents or dangerous overheating.
- Scrape residue from fry baskets after each batch. This simple step prevents buildup that can contaminate oil and impact donut texture.
- Replace worn seals before leaks develop. A small tear can quickly escalate into a significant oil leak and a hazardous situation.
- Document performance metrics for trend analysis. Keep a log of temperature fluctuations, lubrication dates, and any minor issues. This data helps predict future problems.
Deep Clean Day: Procedures for Pristine Performance
A thorough cleaning regimen is paramount for hygiene and equipment longevity. It goes beyond surface wipes to truly refresh your donut maker.
Oil Draining and Debris Removal
This is a critical step that requires careful attention:
- Power off and wait 30 minutes to cool. Even if the oil is below 150°F, surfaces can still be warm.
- Place a heat-resistant container under the oil tap. Ensure it's large enough to hold all the oil.
- Slowly open the drain valve using insulated gloves. This prevents splashes and allows for controlled drainage.
- Scrape residue from fry baskets with a nylon brush; never use metal tools. Metal can scratch the basket's coating, leading to corrosion and food particle traps.
- Wipe interior walls with a soft cloth dipped in warm water before residues harden. This removes easily accessible grease and crumbs.
Choosing Your Cleaning Arsenal
Different residues require different solutions. Having the right cleaners on hand makes the job more effective:
- Citrus-based cleaners (e.g., Ecolab Citrus Force) are excellent for cutting through stubborn grease.
- Enzymatic cleaners (e.g., Zep Oven & Grill Cleaner) target and break down tough starch buildup.
- For scorch marks, a simple baking soda paste (a 3:1 ratio DIY mixture of baking soda to water) can work wonders. Apply, let sit, then gently scrub.
Drying for Durability
After cleaning, proper drying is crucial to prevent rust and mildew. Air-dry all removable parts completely before reassembly. During this drying period, take the opportunity to inspect seals for wear. Once everything is dry and reassembled, run a quick test cycle without batter to check functionality and ensure no cleaning residues remain. Using microfiber cloths can significantly cut down drying time.
Keeping the Donut Flow Uninterrupted: Preventing Downtime
Downtime is a profit killer. The best way to avoid it is through a rigorous schedule of inspections and acting quickly on any red flags. Fixing minor flaws within 48 hours reduces repair costs by 65%.
Key Checkpoints for Continuous Operation
Integrate these specific checks into your routine:
- Plunger alignment: Check daily for consistent batter flow. A misaligned plunger means irregular donuts.
- Heating consistency: Weekly verification ensures oil variance stays within ±5°F, preventing uneven browning.
- Seal integrity: Monthly inspection for zero leakage prevents oil waste and hazardous spills.
Tracking for Trends
Don't just fix problems; understand them. Documenting performance metrics allows for trend analysis. Gradual increases in oil temperature fluctuations, for example, often signal worn parts before they fail catastrophically. Another key preventative step is to lubricate plunger guide rails every 300 cycles; this keeps the batter flowing smoothly and reduces wear on crucial components.
Building it Right, Running it Smooth: Assembly and Operation Best Practices
Your donuts are only as good as your setup. Correct assembly alone prevents 62% of startup performance issues, and optimized operation settings mean perfect donuts every time.
Flawless Assembly: The Foundation of Performance
Before you even think about batter, ensure every part is correctly placed:
- Verify all parts are present and undamaged.
- Attach the plunger mechanism first. Misaligned rods are a common culprit for uneven batter flow.
- Tighten bracket screws diagonally to ensure even pressure and a secure fit.
- Test electrical connections with a voltage checker. Loose wiring accounts for 31% of early-stage operational issues.
- Double-check all safety latches and temperature probe placements. These are critical for safe and accurate operation.
Dialing in for Donut Perfection: Operational Settings
Once assembled, fine-tuning your machine's settings is where the magic happens. Teams report 22% fewer irregularly shaped products when following these guidelines:
- Program timers in 15-second increments to match your batter's viscosity perfectly.
- Monitor oil temperature stability. Fluctuations over 10°F indicate a need for thermostat recalibration.
- Extrusion Speed: Aim for 2.5-3 RPM (slower for thicker batters) for ideal donut formation.
- Fry Time: Generally, 90-110 seconds works well (longer for cake-style recipes).
- Oil Temp: Maintain 360-370°F, with a ±5°F variance being acceptable.
For those looking to deepen their understanding of efficient donut production and design, exploring a comprehensive Donut SMP farm schematic guide can provide valuable insights into optimizing your entire setup.
Finally, if performance drops, always check for batter residue in extruder nozzles. A warm water soak can restore flow rates 87% of the time, often saving you from unnecessary troubleshooting.
When Things Go Wrong: Troubleshooting & Repair Basics
Even with the best maintenance, issues can arise. Knowing how to quickly diagnose and address common problems can save you from extensive downtime. Three issues account for 78% of service calls: oil temperature swings exceeding ±15°F, intermittent heating, and error codes related to the power supply.
Your First Line of Defense: DIY Fixes
Before calling a professional, run through these basic checks. They resolve 60% of problems:
- Unplug the unit and allow it to cool below 100°F. Safety first.
- Inspect all connections for corrosion or looseness. A simple loose wire can cause intermittent heating.
- Reset circuit breakers if you suspect voltage drops are causing power supply error codes.
- Clean sediment from element housings if you're experiencing erratic heating. Buildup can insulate elements and hinder heat transfer.
Knowing When to Call for Backup: Expert Help
Some problems are beyond a DIY fix and require immediate professional attention. Delaying can lead to severe damage or safety hazards:
- Burnt wiring smells: Disconnect power immediately. This is a serious electrical fire risk.
- Persistent error codes: If error codes don't clear after basic troubleshooting, consult a certified technician. You risk board failures if you ignore them.
- Oil leaks near heating zones: This is an emergency service call. Such leaks present a significant flare-up hazard.
Regular manual reviews, including listening for unusual sounds and checking for oil leaks, prevent 85% of complex repairs. Don't underestimate the power of keen observation.
Future-Proofing Your Farm: Upgrading for Efficiency and Hygiene
While meticulous maintenance keeps older machines running, strategic upgrades can significantly enhance your operation's efficiency, hygiene, and overall output. Newer models often feature self-cleaning cycles and antimicrobial surfaces, drastically reducing manual scrubbing.
The Case for Modernizing Your Donut Makers
Advanced units offer measurable improvements:
- Cleaning Time: New models boast cleaning times as low as 12 minutes, compared to 45 minutes for older machines.
- Energy Use: Modern units are more energy-efficient, using around 1300W/hour versus 1800W/hour for older counterparts.
- Removable Parts: With typically 9 removable components, new models are easier to disassemble and clean thoroughly compared to older designs with only 4.
Upgrading to newer equipment addresses 78% of traditional pain points, from stubborn grease buildup to energy costs.
What to Look for in a New Machine
When considering an upgrade, compare energy ratings, warranty coverage, ease of cleanability, and compatibility with your existing kitchen setup. Prioritize models with dishwasher-safe parts and those certified for use with food-grade cleaning agents. Components made from high-quality stainless steel, for example, can cut daily prep time by 20% due to their durability and ease of cleaning.
The Sweet Spot of Success: A Culture of Consistent Care
Mastering the art of Troubleshooting & Maintenance of Donut Farms boils down to discipline and a proactive mindset. Consistent care reduces repair costs by up to 40%, safeguarding your investment and ensuring uninterrupted production. Always use pH-neutral solutions and the correct water temperature for cleanup to protect your equipment's surfaces. Set recurring reminders for crucial tasks like lubrication cycles and thermostat checks.
By embedding these practices into your daily operations, you're not just maintaining a machine; you're cultivating a thriving, efficient, and profitable donut farm that consistently delivers delicious, perfectly formed treats.